Slide 1 Slide 2 Slide 3 Slide 4 Slide 5

Tuesday, May 31, 2011

Posted by Jyothi Infotech | 0 comments

Desktop Calendar June 2011
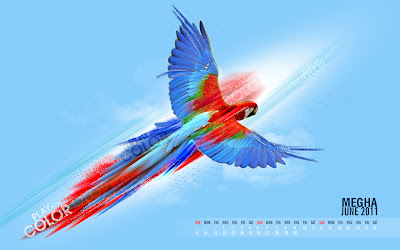
Friends play with colors.. have a colorful month...!

Read more...

Friday, May 20, 2011

Posted by Jyothi Infotech | 0 comments

What is Vector ?

What are Vector Images?


Vector images are made up of closed or open editable paths making any shape with colour fill and colour outline and the size is not depending on the pixels. So that the vector images are delivering very sharp and clear output and can be enlarged to any size without pixelated.

Vector Images are very useful in print media and cartoon animation industry.


-----------------------------------------------------------------------------------------

Bitmap vs Vector

Vector Images are totally different from Bitmap images. Bitmap images are based on pixels and can be scalable up to the pixel size only and will be pixelated on further enlargements. But Vector Images are scalable and can be enlarged indefinitely without any loss in quality. Also the file size of the vector images are very very less compared to bitmap images. So that the vector images are very easy to transfer and requires minimum disk space to store.

-----------------------------------------------------------------------------------------

Vector Editing Softwares

Lot of Vector Editors are available to create and edit vector images. The leading vector editing softwares are CorelDraw & Adobe Illustrator. Also many best vector editors are available such as Adobe Fireworks, Xara Xtreme, Inkscape, etc.

Generally, vector graphics are more suitable for animation. One of the best Vector based 2D animation software is Adobe Flash which plays a very big role in web design & web animation. Desktop Publishing softwares like Adobe InDesign, Corel Ventura, QuarkXpress and Microsoft Office are also having some vector drawing tools. Even Adobe Photoshop, one of the best photo editing software is also provide some features to work with vector images.
Read more...

Wednesday, May 18, 2011

Posted by Jyothi Infotech | 0 comments

Secret Shortcuts

Note: this article is written in Mac Photoshop format. If you are using PC,

Cmd = Ctrl and Opt = Alt.

  1. Drag selection
    With the Marquee tool, drag on the document (do not release the mouse yet), now hold down Spacebar, it will let you drag the undefined selection.

    screenshot

  2. Navigate the document left or right
    Hold down the Cmd key and scroll up or down allows you to navigate the document left or right. For example, hold down Cmd + scroll up will navigate to right.

    screenshot

  3. Browse the font list
    Put your cursor in the font list dropdown, you can browse the font list by pressing arrow Up or Down key.

    screenshot

  4. Scale font size
    Select the text that you want to scale the font size, press Cmd + Shift + > or < to increase / decrease font size.

    screenshot

  5. Zoom with the scroll wheel
    You can zoom in / out by Cmd + Opt + scroll up or down.

    screenshot

  6. Drag to adjust numberic value
    Mouseover the input box, hold down Cmd + drag left or right to increase / decrease. Hold down Cmd + Opt or Shift key and drag can change the value in decimal or 10 interval. This shortcut works in all dialog palettes.

    screenshot

  7. Scroll to adjust numeric value
    Put the cursor in the input box, scroll up or down to increase / decrease value. This shortcut works in all dialog palettes.

    screenshot

  8. Arrow up / down to adjust numeric value
    Put the cursor in the input box, press arrow Up or Down to increase / decrease. Hold down Shift and press arrow Up or Down will change value in 10 interval.

    screenshot

  9. Zoom to 100%
    Double click on the Zoom tool will zoom document to 100%.

    screenshot

  10. Collapse or expand all layer groups
    You can collapse or expand all root-level layer groups by holding down Cmd + click on the triangle icon. Hold down Cmd + Opt + click on the triangle icon will collapse or expand all level layer groups.

    screenshot

  11. Show / hide in a row
    If you need to show / hide more than one layers, instead of clicking one by one, you can click on the visibility icon and drag in a row.

    screenshot

  12. Hide other layers
    Hold down Opt + click on the visibility icon will hide all other layers.

    screenshot

  13. Navigate layer blending mode
    Opt + Shift + "-" or "+" key allows you to navigate through the blending mode dropdown.

    screenshot

  14. Set specific blending mode
    Opt + Shift + C, N, M, S, D... allows to set layer to specific blending mode.
    For examples:
    Normal = Opt + Shift + N
    Screen = Opt + Shift + S
    Multiply = Opt + Shift + M
    Color = Opt + Shift + C

    screenshot

  15. Lock layer transparency
    Press forward slash ("/") to lock layer transparency.

    screenshot

  16. Load Channel selection
    You probably know that Cmd + number keys (1, 2, 3) will activate the channels in sequent. Press Cmd + Opt + number keys will load the selection. For example, press Cmd + Opt + 4 will load Alpha channel 1.

    screenshot

  17. Tool panels
    Press Tab to toggle tool panels.

    screenshot

  18. Precise cursor
    Caps lock will display tool cursor in precise mode.

    screenshot

  19. Navigate the tool list
    You can navigate through the tool list by pressing Shift + tool shorcut. For example: B = Brush tool, if you press Shift + B again, you will switch to Pencil tool.

    screenshot

  20. Increase / decrease brush size
    With the Brush tool selected, you can increase / decrease the brush size by pressing [ or ] key (square bracket key). Press Shift + [ or ] will increase / decrease brush hardness.

    screenshot

  21. Opacity
    You can set the layer opacity by pressing the number keys (ie. 1 = 10%, 2 = 20%...). When you have the brush tool selected, pressing the number keys will adjust the brush opacity.

    screenshot

  22. Duplicate layer
    There are several shortcuts to duplicate layers.
    1. You can hold down Cmd + Opt + drag to duplicate the active layer.
    2. Cmd + Opt + arrow keys (Up, Down, Left, Right).
    3. Cmd + J will duplicate the active layer in exact position.
    4. Hold down Opt + drag within the Layers palette can also duplicate layers.

    screenshot

  23. Copy visible and paste in a new layer
    Press Cmd + Opt + Shift + E will copy the visible layers and paste in a new layer.

    screenshot

  24. Change workspace background
    By default Photoshop use grey for the workspace background color. You can change that by:
    1. select your favorite color
    2. choose the Paint Bucket tool
    3. Hold down Shift + click on the working area (outside the document area)

    screenshot

    Update: right-click on the workspace area to get a dropdown menu - allows you to set the background to black, grey, or a custom color (commented by Todd Patrick).

  25. Fill background or foreground color
    Opt + Delete (Backspace) = fill the layer with foreground color.
    Cmd + Delete (Backspace) = fill the layer with background color

    screenshot

    Update:
    Cmd + Shift + Delete (Backspace) = Fill non-transparent pixels with background color Opt + Shift + Delete (Backspace) = Fill non-transparent pixels with foreground color
    (commented by André Dion)

  26. Switch between document windows
    Ctrl + Tab will switch between document windows.

    screenshot

  27. Load layer transparent
    Cmd + click on the layer thumbnail will load its transparency.

    screenshot

  28. Scale proportionally from center
    When you are using the Marquee tools or Free Transform, hold down Opt + Shift + drag will scale proportionally from the center.

    screenshot

  29. Shortcut to Eyedropper
    If you have the Brush tool selected, hold down Opt key will quickly activate the Eyedropper tool. Hold down Opt + Shift will activate the Color Sampler Tool.

    screenshot

  30. Finally...
    Finally, if you want to check or set your own custom shortcuts, press Cmd + Opt + Shift + K will bring up the Keyboard Shortcuts panel.

    screenshot


You know another shortcuts please comment me..

thanx and regards.

Megha Reddy
Read more...

Tuesday, May 17, 2011

Posted by Jyothi Infotech | 3 comments

Photoshop Short cuts

Photoshop Shortcuts


Dear Friends,
Download this pdf file. This includes Photoshop short cuts..
This all shortcuts accelerates for your works

Click here to download the .pdf file.

Thanx n regards

Megha


Read more...

Friday, May 6, 2011

Posted by Jyothi Infotech | 0 comments

May Month Calendar

May 2011 Calendar


Read more...

Thursday, May 5, 2011

Posted by Jyothi Infotech | 1 comments

Make Funny Photo with your Face

This is the best for creating funny images with your face. PhotoFunia is very accurate and creates fake images with your face. You don’t need any photoshop skills to create such images, and the entire process takes just clicks.

Visit : PhotoFunia

How to Use this site :

Using PhotoFunia is simple: Upload your image, Choose a predefined template (effect) and Done! It has a great collection of beautiful effects.

Once you have created images, you can download them to your computer and share with your friends on social networking sites like Facebook Orkut, Myspace etc. Users can send these images as postcard to their friends directly from the site.

As, it is an online tool, you don’t need to download or install anything.

Try PhotoFunia and create funny pics!

Read more...
Posted by Jyothi Infotech | 2 comments

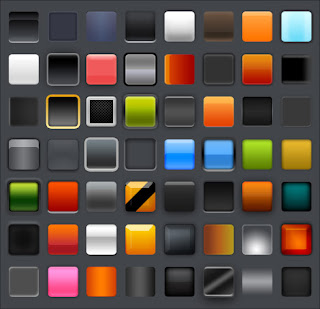
Photoshop Styles

Today i teaching you about styles..
Photoshop styles are helps us to design colourfully.
Most of styles are using in fonts..
download the below styles and enjoy
Click here to download


after downloading this styles extract all.
select the fx Styles file copy it
open your photoshop
go to Windows > Styles
In style window (right side)
click and select load styles
open a new window paste your style file
and select and click load.


Type any text and apply any style
for any adjustment. do in Blending option..

Enjoy...
Read more...